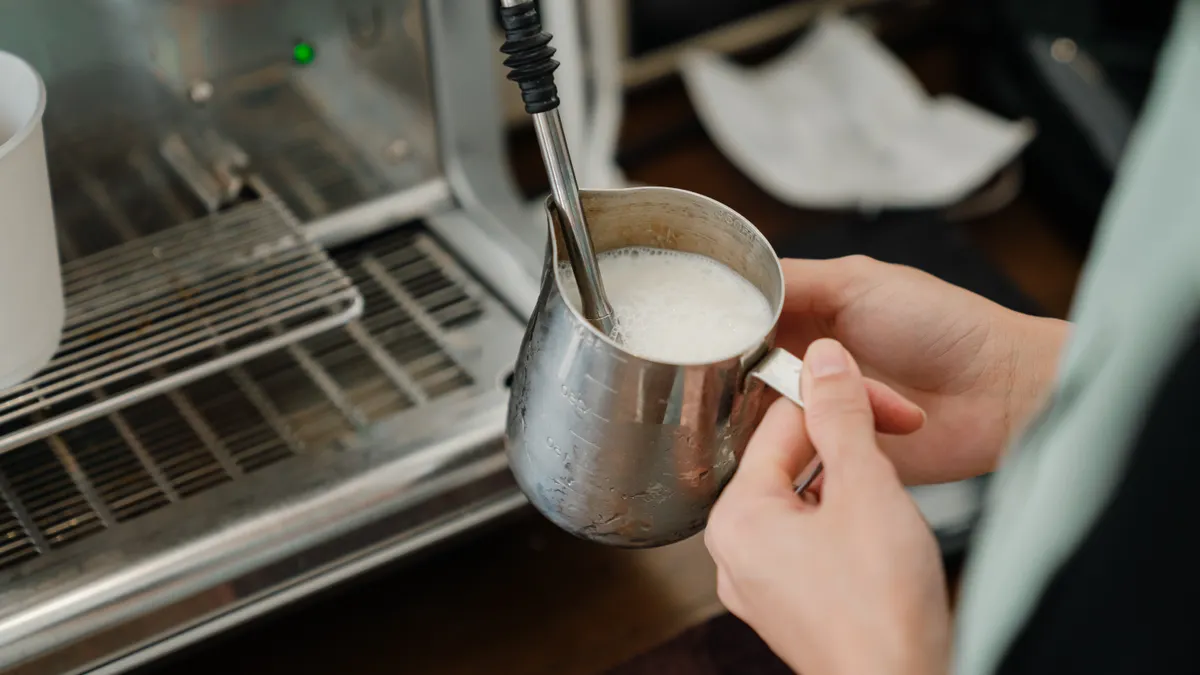
Casi todos los que empiezan con arte latte en casa culpan a su mano. Y muchas veces el problema empieza antes: en el cartón de leche que eligieron en el supermercado y en cómo la calentaron. Puedes tener buena técnica y aun así pelear con una leche que no ayuda. Aquí va lo que de verdad importa para conseguir una microespuma brillante, que se pueda dibujar.
Qué hace que una leche "sirva" para arte latte
Al vaporizar pasan dos cosas a la vez: metes aire y calientas. Las proteínas de la leche (caseínas y proteínas del suero) se colocan alrededor de cada burbuja y la sostienen; la grasa le da cuerpo, sabor y esa textura sedosa. Si falta proteína, las burbujas se rompen. Si falta grasa, la espuma queda seca y rígida, más parecida a la de un cappuccino de gasolinera que a pintura líquida.
Por eso no existe una "leche mágica", sino un equilibrio. Lo que buscas es una espuma con burbujas tan pequeñas que no las veas, que se mezcle con el espresso y fluya como pintura cuando inclinas la jarra.
Leche entera: el punto de partida
Si estás aprendiendo, usa leche entera. En Estados Unidos la leche entera tiene alrededor de 3,25 % de grasa y es la que la mayoría de baristas recomienda para practicar. Cuando la gente de Clive Coffee comparó varias leches, la entera se vaporizó mejor que la 2 % y que la descremada.
La 2 % se puede trabajar, pero perdona menos: la espuma se separa más rápido y tienes menos tiempo entre que terminas de vaporizar y empiezas a verter. La descremada hace mucha espuma, sí, pero es espuma de burbuja grande y seca. Sirve para un cappuccino tradicional, no para dibujar.
Leches vegetales: cuál funciona y cuál no
Aquí está la diferencia que más confunde: la versión "barista" de una leche vegetal no es marketing vacío. Si miras los ingredientes de una leche de avena barista típica, como la de Oatly, verás aceite vegetal añadido y fosfato dipotásico, un regulador de acidez que ayuda a que no se corte al contacto con el café. Eso es lo que le permite comportarse parecido a la leche de vaca.
- Avena barista: la mejor opción vegetal para arte latte. Ojo: la espuma dura menos que la de leche entera, así que vierte apenas termines.
- Soya barista: tiene buena proteína y hace espuma estable, pero puede cortarse con espressos muy ácidos o si la leche está demasiado caliente.
- Almendra y anacardo (cashew): difíciles. Suelen dar una espuma delgada que se deshace en uno o dos minutos.
- Leche vegetal "normal" (no barista): para el cereal, no para la jarra.
Una regla útil: con leches vegetales, calienta menos. Con unos 55–60 °C (130–140 °F) es suficiente; pasarte las vuelve aguadas y les cambia el sabor.
Sin lactosa y ultrapasteurizada
La leche sin lactosa es leche normal a la que le añadieron lactasa, una enzima que parte la lactosa en azúcares más simples. Por eso se siente más dulce. Para arte latte se puede usar; si es entera, pruébala igual que la normal.
Muchas leches orgánicas en Estados Unidos son ultrapasteurizadas (calentadas a temperatura muy alta para que duren más). Hay baristas que dicen que espuma distinto y otros que no notan diferencia. Mi consejo: no te cases con una teoría. Compra dos marcas, vaporiza la misma cantidad a la misma temperatura y quédate con la que se vea más brillante en la jarra.
La temperatura importa tanto como la leche
Muchos de los problemas al empezar vienen de calentar de más. La leche debe empezar fría, recién sacada del refrigerador (unos 3–4 °C). Eso te da tiempo para meter aire al principio y luego girar la leche hasta que quede lisa.
- Objetivo: 60–65 °C (140–150 °F). Es cuando la jarra se vuelve incómoda de sostener con la mano.
- Límite: por encima de unos 70 °C (160 °F) las proteínas se desnaturalizan, la espuma pierde estructura y la leche sabe a cocida.
- No recalientes: la leche ya vaporizada no se vuelve a vaporizar. Bota y empieza con leche fría.
Un termómetro de clip cuesta poco y te ahorra semanas de adivinar. Cuando ya tengas la mano entrenada, lo dejas.
El detalle de Houston: la leche caliente no perdona
En Houston, entre el supermercado y la casa, el carro se convierte en horno buena parte del año. Una leche que viaja media hora sin hielera y luego vuelve al refrigerador no se va a dañar de inmediato, pero empieza a cambiar antes de tiempo. Para el café con leche, compra la leche al final, llévala en bolsa térmica y guárdala al fondo del refrigerador, no en la puerta, que es la zona que más cambia de temperatura cada vez que la abres.
Lo mismo con la jarra: si la dejas al lado de la máquina caliente, la leche arranca tibia y pierdes segundos valiosos para texturizar. Guárdala fría o enjuágala con agua fría antes de usarla.
Cuánta leche y qué jarra
Para una taza de 6 a 8 oz, una jarra de 12 oz (unos 350 ml) es lo más cómodo. Llénala hasta justo debajo de donde empieza el pico. Con poca leche no tienes tiempo de crear el remolino; con demasiada, la espuma no se integra y te sale una capa gruesa arriba.
Resumen práctico
- Aprende con leche entera y fría.
- Si eres vegano o no tomas lácteos, usa una versión barista, de preferencia de avena.
- Vaporiza hasta 60–65 °C (55–60 °C en vegetales) y nunca recalientes.
- Cuida la cadena de frío: en Houston, la leche y la jarra fría hacen diferencia.
- Compara marcas lado a lado antes de creer lo que dice internet, incluido este artículo.
Con la leche correcta y bien calentada, el corazón o la hoja dejan de ser cuestión de suerte. Lo que queda es práctica de mano: el ángulo de la taza, la altura del vertido y el momento de bajar la jarra. Eso se aprende mucho más rápido cuando alguien te corrige en tu propia máquina.
Almost everyone who starts pouring latte art at home blames their hands. Often the problem starts earlier: with the carton they grabbed at the grocery store and how they heated it. You can have decent technique and still be fighting a milk that won't cooperate. Here's what actually matters if you want glossy, pourable microfoam.
What makes a milk good for latte art
Steaming does two things at once: it adds air and it adds heat. Milk proteins (casein and whey) wrap around each bubble and hold it in place; fat brings body, flavor and that silky mouthfeel. Too little protein and the bubbles collapse. Too little fat and the foam turns dry and stiff, closer to a gas-station cappuccino than to liquid paint.
So there's no magic milk, just a balance. You're after foam with bubbles so small you can't see them, that blends into the espresso and flows like paint when you tilt the pitcher.
Whole milk: start here
If you're learning, use whole milk. In the US, whole milk sits around 3.25% fat, and it's what most baristas recommend for practice. When the team at Clive Coffee compared several milks, whole steamed better than 2% and nonfat.
2% works, but it's less forgiving: the foam separates faster, so you get a shorter window between steaming and pouring. Nonfat makes plenty of foam, but it's big-bubbled and dry. Fine for an old-school cappuccino, not for drawing.
Plant milks: what works and what doesn't
This is the part that trips people up: the "barista" version of a plant milk isn't just marketing. Read the label on a typical barista oat milk, like Oatly's, and you'll find added vegetable oil and dipotassium phosphate, an acidity regulator that helps keep it from splitting when it hits coffee. That's what lets it behave more like dairy.
- Barista oat: the best plant option for latte art. The foam fades faster than whole milk, so pour right after steaming.
- Barista soy: good protein and stable foam, but it can curdle with very acidic espresso or when it's overheated.
- Almond and cashew: tough. They tend to give thin foam that falls apart within a minute or two.
- Regular (non-barista) plant milk: for cereal, not for the pitcher.
One useful rule: heat plant milks less. Around 130–140°F (55–60°C) is plenty; go hotter and they turn watery and the flavor shifts.
Lactose-free and ultra-pasteurized
Lactose-free milk is regular milk with lactase added, an enzyme that breaks lactose into simpler sugars. That's why it tastes sweeter. It's perfectly usable for latte art; if it's whole, treat it like regular whole milk.
A lot of organic milk in the US is ultra-pasteurized (heated very high so it lasts longer). Some baristas swear it foams differently; others notice nothing. My advice: don't marry a theory. Buy two brands, steam the same amount to the same temperature, and keep the one that looks glossier in the pitcher.
Temperature matters as much as the milk
Overheating causes a lot of beginner problems. Milk should start cold, straight from the fridge (around 38–40°F). That buys you time to add air at the start and then spin the milk until it's smooth.
- Target: 140–150°F (60–65°C), roughly when the pitcher gets uncomfortable to hold.
- Ceiling: past about 160°F (70°C), the proteins denature, the foam loses structure and the milk tastes cooked.
- Never re-steam: steamed milk doesn't get a second round. Dump it and start with cold milk.
A clip-on thermometer is cheap and saves you weeks of guessing. Once your hand knows the feel, you can drop it.
The Houston factor: warm milk doesn't forgive
In Houston, the car turns into an oven for much of the year. Milk that rides home for half an hour without a cooler won't spoil on the spot, but it starts aging early. For your lattes, grab milk last, carry it in an insulated bag and store it at the back of the fridge, not in the door, which swings in temperature every time you open it.
Same with the pitcher: leave it next to a hot machine and the milk starts lukewarm, costing you precious seconds of texturing. Keep it cold or rinse it with cold water before steaming.
How much milk, which pitcher
For a 6–8 oz cup, a 12 oz pitcher (about 350 ml) is the easiest size. Fill it to just below where the spout begins. Too little milk and you can't build a whirlpool; too much and the foam won't integrate, leaving a thick cap on top.
The short version
- Learn with cold whole milk.
- Dairy-free? Use a barista version, ideally oat.
- Steam to 140–150°F (130–140°F for plant milks) and never re-steam.
- Protect the cold chain: in Houston, cold milk and a cold pitcher make a difference.
- Test brands side by side before trusting the internet, this article included.
With the right milk, heated properly, a heart or a rosetta stops being luck. What's left is hand skill: the cup angle, the pour height, the moment you drop the pitcher. That comes much faster when someone corrects you on your own machine.